 0
0 0
0
 0
0 0
0


Update: I have shared 2 templates for eBooks – the 3D cover and a PowerPoint template. you can get these here.
I’ve had quite a number of people in the FBC Facebook group asking me how to make an eBook. This post is specifically focussed on simple ways to make professional looking ebooks to give away to readers of your blog, presumably as incentive to sign up to your mail list.
Making an ebook to sell (successfully) is a whole other ball game. You need to step up the quality and that means professional looking design, graphics and layout. Then you need to think about how to get people to buy it, how to price it, how customers will pay for it, how to deliver it…the list goes on. It is too much to cover in one post, so I am not covering this in this post.
I’ve made two ebooks that I give away as mail list sign up incentives on my blog, RecipeTin Eats. You can download copies of them here:
How to make an eBook
1. Choose an app to create the ebook
2. Do a test run with the chosen app
3. Design or buy a template for your ebook
4. Writing the ebook & file logistics
5. Promoting the ebook as a free giveaway
6. Getting the ebook to readers
1. Choose an app to create your ebook
My recommendation
 For an easy way to make ebooks, I recommend Pages (Mac) and Powerpoint (Windows and Mac). These two apps tick the following boxes which are important to factor in when creating an ebook:
- Quality of images
- File size without compromising image quality
- Ease of creating and adjusting layouts
- Ease of editing text
Pages is the Mac equivalent of Word for Windows. Powerpoint is available for both Windows and Mac.
 Mac has a presentation app called Keynote which may be suitable – I personally never clicked with this app.
Other apps
Other apps you could use include the following. I’ve shared my thoughts on each of them.
a) InDesign – this is the Adobe software that is used by graphic designers to design cookbooks, magazines etc. If you want to go “all the way”, you will need to invest the time to learn how to use InDesign, or hire a professional. I can tell you that I have spent a good chunk of time on InDesign and found it even less intuitive than Photoshop i.e.. Difficult to use because it is so powerful and has so many functions.
b) Word (Windows and Mac) – this is what I used to make the first free ebook I made. It’s fantastic from a word processing point of view (i.e. ease of editing text – don’t underestimate how much of that you will need to do) but terrible from a layout and design point of view. If you are happy to have an ebook that looks more like a report than a cookbook, then Word is a good option for you.
The other thing I had an issue with was file size. My first ebook made with Word was 39MB for a 33 page ebook with a photo on almost every page. My second ebook made with Powerpoint was 16MB for 38 pages. For both, I reduced the image sizes before inserting them into the document.
c) Keynote – as commented above, this is the Mac equivalent of Powerpoint. Traditionally it is used to make presentations. I never got comfortable using this so I am not sure how convenient it is for ebooks. But in theory, it should work as well as Powerpoint.
Photoshop isn’t practical to use for ebooks because each page would need to be a different file.
2. Test Your Chosen App
This is an important step. Different apps work differently on different operating systems, Mac vs PC etc. So before you go an create your entire ebook in an app, only to find that the file size is 60MB for a 20 page book, do a test run!
Here’s what I do:
- Create a 1 page document. Don’t worry about layout and design details, but at least get the orientation right (landscape or portrait)
- Do a mock up of a recipe. Write out the recipe, including hyperlinks to your blog or other URL’s (if you are planning to have them in your ebook) and put the photo in.
- Now save the document as a PDF and check the file size.
- Consider how many pages your ebook is going to be. Now multiply that by the file size. How big is the file? What file size is too big? My first ebook made with Word was 39MB for a 33 page ebook with a photo on almost every page. I was not happy with this file size but I didn’t have the energy to remake the book in another app. My second ebook made with Powerpoint was 16MB for 38 pages. I was happy with this file size.
- Are you happy with the image quality?
NOTE: You will need to play around with the image size vs quality vs document size and find the right balance for you because the quality of everyone’s photos will differ. I reduced my images to 1,000px wide before inserting them into Powerpoint. This provided the right file size / image quality balance for me.
3. Ebook Design
I designed the cover and layout of both my ebooks myself. For a freebie, I could not justify paying a designer and I did not know where on earth I could find e-cookbook templates for Word or Powerpoint.
All I did was go onto the Apple iBooks Store and Amazon kindle store. I browsed cookbooks and found ones that I thought were laid out cleanly, easy to read and were simple to replicate. Then I recreated simplified versions of them to use as my ebook template.
This is the layout I used for the 15 Minute Meals cookbook I created in Word. This was created using tables which I found really tedious and difficult to use (because not every recipe is the same length!). I created one template and used that for every recipe.

And here’s the layout I used for the Fast Prep, Big Flavours ebook. This was MUCH easier to work with than in Word – both design and text editing. I had much more fun designing this one!

THINGS TO CONSIDER WHEN DESIGNING A RECIPE TEMPLATE
- Font size and spacing – for ease of reading on computers and tablets;
- Landscape or portrait? I opted for portrait for the cover (so it looks like a book in thumbnail form in iBooks etc) and landscape for the book itself (so it displays best on screens);
- Include prep and cook time and servings?
- Are you including notes to recipes? Like little tips.
- What about chapters? I put the chapter name in the top right (see below)
- Create a template for short vs long recipes. Here’s an example of a template for the Fast Prep, Big Flavours cookbook for long recipes.

THE COVER
Don’t forget to create a cover as well!! For the 1st ebook I made in Word, I designed the cover in Photoshop, saved it as a PDF then inserted it into the ebook. For the 2nd one, I was able to make it in Powerpoint (which I used for the ebook) which was much easier.
As with the ebook layout, I browsed the Apple iBooks store and Amazon Kindle store and copied an e-cookbook cover that I thought suited my style, could be rebranded to fit with my blog’s look and feel and was easy to replicate. 🙂
Here’s the cover I designed for the Fast Prep, Big Flavours ebook.

4. Write the eBook and file logistics
Now the real work begins – writing the ebook! Don’t forget to reduce image sizes before inserting them into your ebook otherwise the file size will be enormous! (Refer step 2 for tips)
Tip: If you are using Powerpoint, you will have an option to compress images. Choose the resolution “Best for viewing on screen”, which assumes the readers are viewing it on screen rather than printing it out. This makes a huge difference to the file size.
Because my ebooks were intended to be free for readers, I mainly included recipes on my blog. Which you might think means it’s just a copy/paste job, but it’s not! I found I had to condense the recipes, remove or change the way tips were phrased etc.
But I also included a few recipes exclusively for the ebook. 🙂
After you have finished your ebook and have had it proofread many, many times, convert it into a PDF file (simply by going to File > Save As, then select PDF as the file format).
Then you need to upload the ebook somewhere where you can provide your readers with a link to download it. If the file size is small enough, you might even be able to upload it into WordPress. I just use Dropbox because that’s where I store all my files anyway.
Remember: If the file size is too large, people will struggle to download it! My first ebook is 39MB which I think is far too big. Personally for me, I think 25MB is a reasonable file size.
5. Promoting It
 After all that hard work, make it front and centre so visitors to your blog see it!! I use my ebooks as incentive for visitors to my blog to sign up to my mail list. Here are all the places I promote the free ebook:
- Blog sidebar – right at the top, including an image
- OptinMonster Pop up
- Facebook page, using the MailChimp Facebook app
- Within my most popular posts (I created a banner “ad”)
6. Getting the ebook to readers
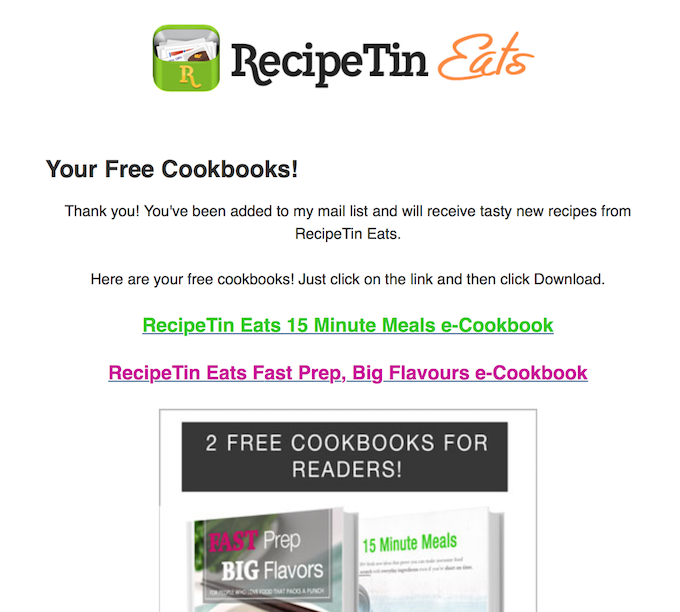
As part of the sign up to a mail list, the readers will receive confirmation emails. I use MailChimp and I simply edit the last “thank you” email that new subscribers receive to provide a link to download the free ebooks.
This is what mine looks like. If you use a mail list manager like MailChimp, you will also have the option to direct new subscribers to a page on your blog instead of receiving a thank you email. So you could embed the download links there instead, if you preferred.
*******
Wow! That post was longer than I expected, and I have so much more to say!
I’m actually in the middle of creating an ebook that I plan to sell. So once I get that out, I’ll have first hand step by step instructions for you for how to sell an ebook!
Hope you found this useful! Thanks for reading – Nagi x
0000
Hi Nagi and Thank you so much for this post! I was keeping me from writing an ebook because I am not “tech savy”. You post is very helpful and crystal clear. Thank you again!
hello, thank you so much for these tips! How di you create the facebook page using mailchimp?
Hi Nagi,
I can’t believe I am just finding your blog for the first time and I am in L-O-V-E with your site. I am a beginner and want to start a blog…any advice, tips, etc. on where to start? I found your blog through a word search on how to write an ebook, so ultimately I’d like to get a book published as well. So any advice as to the quickest, easiest, pain-free way to get started would be greatly appreciated.
Oh wow! So very helpful.I love step by step instructions. I have written my 1st teeny e-book for sign-ups and it’s all ready to go on my site-thanks to you!
I have flirted with the idea of doing an e-book and something that I thought about was including links to my website in the content and then making this a free e-book in the Amazon Kindle store. The idea is to drive free traffic to the website. Has anyone tried this method? If so, did you get good results?
Nagi, I want to thank you for your inspiration and generosity. My oldest daughter has asked me for a long time to put together a cookbook of family favorite recipes, and I would start trying, only to feel so lost. Finally, with your help, I feel like I can get started. I purchased your Food Photography Book today for further guidance:) I don’t have a food blog (yet?), but I am at a time when I need to come up with a new direction and hopefully a source of achievement. Thanks again.
Excellent post
Thank you for this blog post. While my eBook ambitions are less graphics heavy this was very helpful. I think you are a little over critical of file size. With HD and Ultra HD displays I think you can bump up the graphics quality to 300 pixels per inch (PPI) and most folks will be okay with file sizes 2.5-3 MB per page.
Amazing article, I am sat here in Lanzarote creating my first workout ebook, very helpful!
Many thanks,
Dave x
I’m looking for a PPT template for cookbook that I’m going to write for my http://www.naturelyshop.com Do you know where to download some?
thanks
I couldn’t download the ebook files. Any idea what I’m doing wrong?
I cannot download anything either.
Just amazing tips! – Nagi….At what email address can i email you? Thank you Zeena
Nagi – do you know if this format could be used for Kindle books? Wasn’t sure if they needed to be landscape or another setting.
Hi Lisa!
Recipeasy takes the pain out of creating a beautiful E-Book by taking caring of the formatting and design while letting you focus on what really matters, your recipes.
Check it out! http://recipeasy.co/
Hi Nagi, This is a tremendous help, and such a beautiful template! I imported it into PowerPoint (on Mac) and also in Google Drive Presentation, and the formatting isn’t looking quite right. Any tips? Thank you!! =)
Thank you so much Nagi you are amazing!
So helpful! I have completed a cookbook with my chef writing and cooking partner and was scouring the net for using power point and your explanation was so easy to follow. Now, of course, I have to do it. I may come back with some questions when I am in the process! Thank you, thank you!
Brilliant and helpful. I created my own on Keynote and Canva – then merged them via PDF Preview. Still need to get them on my site – but basically I read your blog over and over and then said – I CAN DO THIS!! Thanks Nagi
Thank you so much for this wonderful resource, Nagi! Thanks to your site and templates, I just COMPLETED my first ebook to offer new subscribers – and I did it in just 2 days! It wouldn’t have been possible without your templates 🙂
I only have one question. How did you create a link for people to click and download the file? Did you use MailChimp’s option to upload it to their servers? If you know of an article on how to do that I would really appreciate it.
Thank you SO MUCH again for such an excellent and helpful website!!!
Hi again Nagi!
I actually found the answer to this one myself if any other readers would like to take a look! Here’s the tutorial I used to do it and it was super easy. I uploaded the file right onto MailChimp 🙂
http://gretchenlouise.com/free-download-mailchimp-email-subscribers/
I also created a new campaign and sent an email to my current subscribers giving them the ebook as well.
Yay!
Hey Nagi, thanks for sharing this info. So, I am in the middle of creating my first eCookbook. I was going to do it in PDF (like you) but a friend of mine who is a pro when it comes to digital marketing told me that if I really wanted to stand out and be professional, I had to do it in ePUB as PDF doesn’t really look great on smartphones/tablets, plus the file size is definitely larger. So, now, I am in the middle of ePUB publications and I hired a freelancer to help me out. I originally tried to do it with Blurb but there were some limitations so I hired someone to help me do it with Indesign. I am sending him my design template idea, plus the files (text and images) and he creates the eBooks for me. I guess I didn’t choose the easy route for my first cookbook but I am a perfectionist. What can I say 😉
Also, I just subscribed to your list to get the cookbooks and I noticed you only give the links on the landing page after people confirm their email. What happens if people do not download it right away? Do you also send them an email with the links?
That’s what I was thinking about doing as I am using OptinMonster and MailChimp as well on our blog (www.196flavors.com)
Thanks a lot for your insight!
I’ve been wanting to do an e-book for a while but thought it was out of my league! You really made it easier by breaking down the steps! Thanks so much for sharing!!!
Ginger Marie | http://www.thegingermarieblog.com
No worries! So glad you found it helpful! N x
Nagi, I’m getting onto this seriously now (yup, about time!). Just a quick question – you said you used a table to do your first book in Word. How did you do it in Powerpoint? Did you use text boxes to make a template? 🙂
Yup, I used text boxes. Seriously, email me, I’ll send you my book, you can change it to your requirenments! N x
That’s so kind of you, hon. Emailing you now … I just thought of another (quick) question! 🙂
This is an awesome post, Nagi! I used Canva for my free e-book (which is not a cookbook). I would have used powerpoint if I had known. 🙂 My Canva experience was OK. It had cool graphics I could use for free but text editing was horrible. By the way, did you also use powerpoint for your chicken wings book?
Hi Sue! I sure did! I’m using Pages for the Photography cookbook only because it has much more text than the wings cookbook. Defiantly less convenient than Powerpoint, having so much trouble getting images to stay in the right place!
Hey Nagi! I’m in the midst of self-publishing my own e-cookbook (using Word & PDF converter).
I have an email list (currenly at 641, but I suppose it should hit 700 by the time I launch my ebook) but very many who are responsive. I’m thinking, do you have any tips on how I should try to market my ebook to the people who may enter my blog for the first time (for eg. traffic from Pinterest)? I want to capture that traffic and sell them the book. I will be putting a banner ad in my right sidebar, perhaps an banner ad for the book at the end of each post… but how else do you think I should market it?
Thanks so much!!
So helpful!! Thank you!
This is so incredibly helpful! I know I’m just a budding little food blogger, but I have an idea for a book that I’m collecting information for, so I’m soaking up all of the knowledge about creating an ebook that I can! 🙂 Thanks so much! Always love reading your posts!
Happy to be of help Ariel!! 🙂
Thank you o much Nagi! I’m a newbie and this is all so helpful! Pinning!
Glad you found it helpful!! 🙂
This is so great, Nagi. Creating a free ebook is most definitely on my list of (important) things to do, but I had no idea how to go about it. If I’m honest, reading all this makes me feel a bit overwhelmed, but I know that it’s also something I can achieve – just need to put my mind to it and wade through step by step.
Thanks again … this is actually a bit of a priceless resource!!
Helen, I promise it’s not overwhelming! Just create a template, pick a handful of recipes from your blog and copy/paste them in. Edit the words to make them fit in nicely, plonk the pics in, create a cover and boom! You’re done! 🙂
This is just wonderful!! thank you for sharing with us!
No worries Sam! 🙂
Hi Nagi! Quick question: how did you get your e-books to look like a book on a bookshelf- hard covers with bound pages turned to the side (when you advertise it in your side margins)? Thank you!
Hi Josie – I just found a free template then replace the cover with my own cover 🙂 Here’s what I googled https://www.google.com.au/search?q=free+3d+book+cover+template&client=safari&rls=en&source=lnms&tbm=isch&sa=X&ei=9PtYVdbuIovi8gWupYDwAg&ved=0CAcQ_AUoAQ&biw=1231&bih=788
Thank you Nagi! Great tips. My first feat is to sort out and switch over to mail chimp. I know your new e-book will be a huge hit! Your food photos always make me want to lick my computer screen… LOL Have a super weekend.
Hey Bobbi! You’re timing is perfect, my next post is how to move over to Mail Chimp!! 🙂
Ahh!!! Isn’t this post just in time. I am planning to create an e-cookbook shortly but had very few ideas. I get all my answers here. Looking forward to rest of your posts..
Great timing!! 🙂
Just fabulous Nagi. Amazing what you have done with powerpoint. I am going to have to brush up my skills on using it.
Trust me, I don’t do anything fancy with it! If you are comfortable with the basics of Word, Powerpoint is easy to pick up 🙂 I never took tutorials or anything, just started and figured it out as I went along!
Nagi darling you are such a gem. Profoundly lucky to have known u (even if it’s just virtual) . Thanks for everything that you do 🙂
No worries!! 🙂
You, my dear, are a rock star. This is a fabulous tutorial – thank you!!
Aw, thanks Marissa! I know the way I made mine aren’t high tech fancy, but they worked!! 🙂